Lab 2
- Introduction
- Getting Started
- Physics
- Collisions
- Player Controls
- Tilemaps
- Enemies
- Putting it all together
- Some Art Assets
- Further Information
- Some Frequent Pitfalls
Introduction
In this lab you will develop a 2D jump’n’run game using Unity, where you write the code that handles physics yourself. Recall the different parts of the Unity screen from last time:
Getting Started
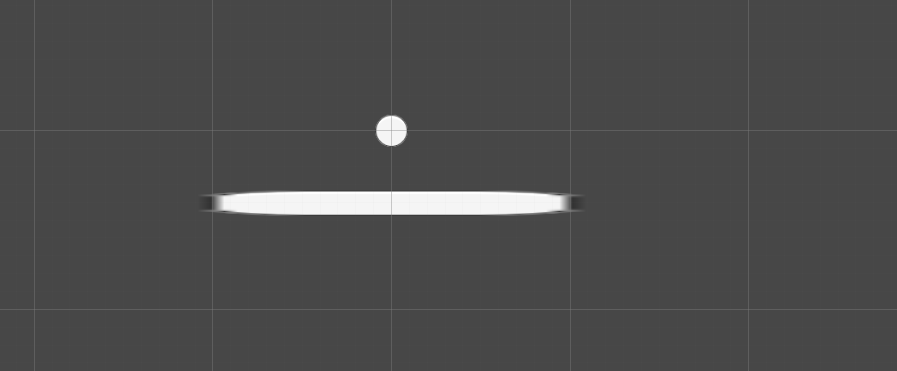
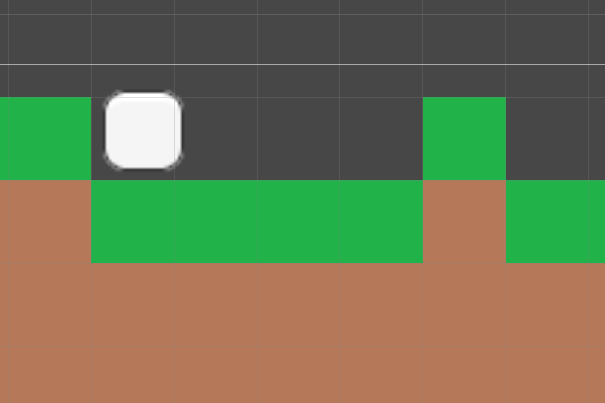
Open Unity and create a new project, choosing “2D” as the project type. This will automatically create a main camera that is set up to project 2D images (calles “sprites”) to the screen. Use the Game Object menu to add a sprite (found under “2D Object”) to your scene. Sprites represent all objects in our 2D game, and this particular one will be the player, so give it an appropriate name. Currently, you will not see anything in the scene, since we haven’t told Unity which picture to use. In the inspector, under “Sprite renderer” you can see the “Sprite” property. Use the small circle to the left to set the picture to be used. Right now, because we have not added any actual sprites to the project, we can only choose from the default sprites (that are normally used for UI elements). Pick the “Knob”, which will give you a nice circular shape. Change the player’s scale to x=4, y=4 so you can actually see it well on the screen. Create another sprite, which will the first platform in our level, and choose “UISprite” as its sprite. Make the platform sprite a bit wider than the player sprite (e.g. with an x-scale of 60), and place it below the player, to get something like this:
Physics
Before we actually implement physics, here is a short review of how an object’s position is calculated from it’s velocity and acceleration. First, the velocity is the integral of the acceleration over time:
The location of an object is the integral over its velocity over time:
While an object may be accelerated in many ways, one key acceleration it experiences is gravity:
However, because integrals are not fun to solve, and our game runs in discrete time steps anyway, we can replace the integrals with sums over small time differences. The velocity an object experiences is the sum over the acceleration over time. Think about what this means: If you have an acceleration of [1 m/s^2], and the object initially does not move, after 1 second (using 1 second-time steps), the object will move with 1 m/s, after two seconds with 2 m/s, etc. Or, as formulas:
Now, how do we translate this velocity into a location?
To implement this, what we need to do is store the velocity and position (Unity already does the latter for us), and add the acceleration times [\Delta t] on every (small) time step to the velocity, and then the velocity times [\Delta t] to the position. In Unity, this works using the following code:
Vector3 acceleration = -9.81f * Vector3.up;

velocity += acceleration * Time.deltaTime;

transform.position += velocity * Time.deltaTime;
Time.deltaTime tells you how much time passed since the last frame update. We are using Vector3 instead of Vector2 here, because the positions in Unity are always in 3 dimensions (you could also use Vector2 internally everywhere and then cast it to a Vector3 when you change the object’s position.
Create a new script called PhysicsObject, and attach it to your player game object. Put the code above into the script’s Update method and add a public member velocity of type Vector3 to the class. When you start the game now, your player should fall down, and it will then pass through the platform, because we are not checking for collisions yet. In the next step, we will change that.
Collisions
While we are going to use our own code to move objects around, we will still make use of Unity’s physics engine to detect collisions for us. Add a CircleCollider2D and a Rigidbody2D to the player game object, and a BoxCollider2D to the platform. Now, as-is, the Unity physics engine will also apply gravity to the player, which we want to avoid. Therefore, select the player game object, and in the inspector locate the Rigidbody 2D and set the body type to “Kinematic”. This will tell Unity that we want to move the object around ourselves. Now we need to check for collisions when we more. Rather than adding this to the Update method, let’s create a new method Movement in our PhysicsObject that takes a Vector2 move as a parameter and performs the necessary check before it actually moves the object (this can come in useful later, when we want to add other ways to move the object). Add the following code to this Movement method:
if (move.magnitude < 0.00001f) return;

RaycastHit2D[] results = new RaycastHit2D[16];
int cnt = GetComponent<Rigidbody2D>().Cast(move, results, move.magnitude + 0.01f);
if (cnt > 0)
{
    return;
}

transform.position += (Vector3)(move);
First, we check if the movement vector would even move the object, or if its magnitude is so small that it will not change the position perceptibly (this avoid having to perform all the checks every time even if the object doesn’t actually move). Then, we use the method Cast of our Rigidbody2D component. Cast takes the outline of the object, and “casts” it in the given direction by the given amount to check what it would collide with. All of these collisions are put into the results array, and the number of collisions is returned as cnt. For now, we will simply not move the object if we encounter a collision. Now change the Update method to call the Movement method instead of changing the position directly, and your player should fall until it (almost) hits the platform. You can control the distance between the player and the platform with the value of how far you “cast” the collider, i.e. by changing the 0.01f to something larger or smaller. Because a game in which the player just falls downwards is not very interesting, we will now add controls for the player.
Player Controls
The reason we created a script called PhysicsObject is because we want to be able to reuse the code across many different types of objects. However, the player needs some particular consideration. Therefore, create a new script, called PlayerController, and change it so that it derives from PhysicsObject. We will change a few things in PhysicsObject before we implement the user inputs. First, while we used Update for our physics code so far, it is better to do this in FixedUpdate. Like Update, FixedUpdate is called in regular intervals, but while Update is tied to rendering frames (which may take a variable amount of time), Unity tries to call FixedUpdate in very regular intervals. This regularity makes our physics simulation smoother when our game grows larger, so we should use it instead. Simply rename Update to FixedUpdate and use Time.fixedDeltaTime instead of Time.deltaTime. Now add a public member float desiredx, which we will use to let the player move left and right. In FixedUpdate, right before you call Movement, set velocity.x to desiredx.
Now we can set desiredx from outside and the player will move left and right! To do this, open your PlayerController script and in Update check the value of the “Horizontal” axis. If it is greater than 0, set desiredx to 3, if it is less than 0 to -3, and otherwise to 0. Before you try the game, don’t forget to replace the PhysicsObject component of the player with the new PlayerController! When you try the game now, you will probably notice that you can’t really control the character. While you can move left and right while the player is falling (try placing the player object higher above the platform), once you hit the ground you can not move left or right anymore. This happens, because as soon as we would collide with anything, we cease all movement. We will now split up our movement into an x- component and a y-component to fix this problem.
First, add a boolean parameter to Movement, called movex, which will be set to True, if we want to move in x-direction, and to False if we want to move in y-direction. Change your call to Movement accordingly:
Vector2 movement = velocity * Time.fixedDeltaTime;
Movement(new Vector2(movement.x, 0), true);
Movement(new Vector2(0, movement.y), false);
In Movement itself, we now need to iterate over all results of the Cast call instead of the return. cnt tells us how many results we have, and for each individual result, results[i] tells us not only which other object we encountered, but also which direction we hit it in. In the loop, you can use results[i].normal to identify the vector pointing away from the surface you hit (the “normal vector”). If the obstacle is to the left or right of the player, this normal vector will point to the right, or left, respectively. This means it will have an x coordinate of 1 and a y coordinate of 0. In order to handle diagonal obstacles, you can just check if the absolute value of the x-coordinate is greater than some value, like 0.5. Of course, we only check this if we move in x-direction. Add the following code to the loop that checks the collisions.
if (Mathf.Abs(results[i].normal.x) > 0.5 && movex)
{
    move.x = 0;
    velocity.x = 0;
    CollideWithHorizontal(results[i].collider);
}
You may notice that we call a method CollideWithHorizontal, that doesn’t exist anywhere! Create a new method public virtual void CollideWithHorizontal(Collider2D other) in the PhysicsObject class. We can use this method in derived classes to react to collisions. Of course, if you play the game now, you will fall through the floor. Add the appropriate code to handle collisions in y-direction (analogous to the one for the x-direction, with a call to CollideWithVertical). You should now be able to move around the platform with your player and when you run off the end of the platform, you will fall down. Since the game is a jump’n’run, we still have to add jumping.
To add jumping, we add code to PlayerController that sets velocity.y to 6.5f if the “Jump” button was pressed. When you play around with this, you will notice that you can jump now, but when you press the jump button again, you will jump again, even if you are already in the air. Try to think about how you could fix that using the Movement method we already have (hint: you can only jump when you are on the ground, and in Movement you detect when you hit the ground). With running and jumping done, we can now look into making the level a bit nicer.
Tilemaps
We will now make a nicer level, so you can delete the platform (leave the player as-is). Open paint and create a 64x64 image that is filled with green. Save it to the Assets-folder of your Unity project in a subfolder called “tiles”. Repeat with a 64x64 image that is filled brown, and another one that is filled blue. In Unity, make sure the images show up in the project view. Select each of them, and set “Pixels per Unit” to 64
Create a Tilemap game object from the menu “Game Object” - “2D”, then open the tile palette using the menu “Window” - “2D” - “Tile Palette”. The tilemap represents the level of your game, while the tile palette allows you to select different “brushes” to draw your level with. First, select “Create New Palette” in the tile palette window, and create a new folder for it in your Assets directory. Then locate the images you drew in paint earlier in the project view, select them, and drag and drop them into the palette. Unity will again ask you for a directory, just select the tile palette directory you just created. When you select one of the tiles in the tile palette, you will see a grid in the scene view. You can then paint tiles into the level (if not, make sure the “brush” tool at the top of the tile palette window is activated). Use the tile palette to draw a small level (if you misclick, you can use shift+click to erase tiles quickly). Make sure there is at least one blue/”water” tile the player could “fall into” in the level. Before you play the game, select the TileMap game object (which is a child of Grid), and add a “TilemapCollider2D” component to it, otherwise your player will fall through the level. As you play around with the game, you may sometimes be able to fall into the “gaps” between two tiles. We will not fix this problem in this lab, but you should read the tutorials linked below if you need this for your project. You may also notice that you can move the character out of the view of the camera, so - just like in the last lab - make the Main Camera a child of your player game object (you can move the camera around to get a screen layout you like). When you play the game now, it should look somewhat like this:
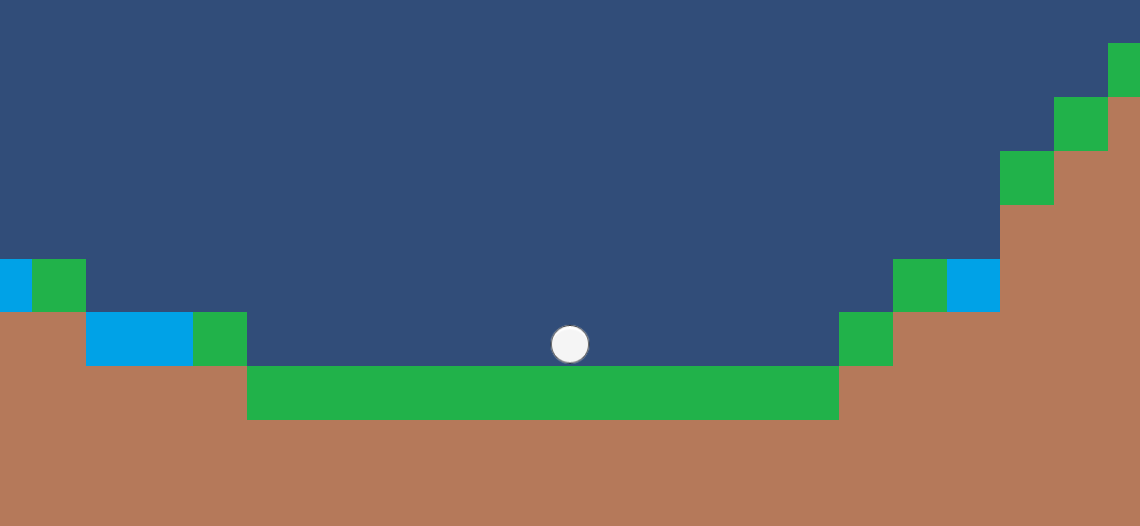
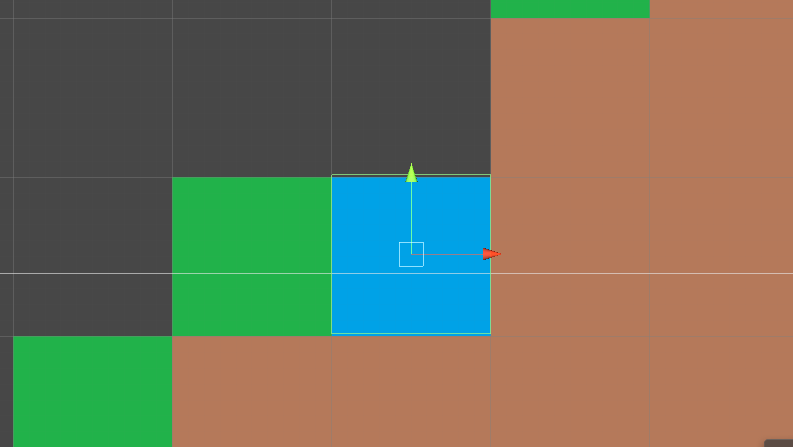
Now we want to make the player reset when they fall into the water. Create an empty game object, and then add a Box Collider 2D object to it. At the top of the inspector you can find a dropdown menu called “Tag” which is currently set to “untagged”. Create a new tag “water” using the menu and assign it to the empty game object. We will use this empty game object as the “collision zone” for the water. Move it around the level so that the collider aligns with a water tile, like this (you want it to extend a bit above the water so the player hits it before they hit the terrain itself):
To reset the player, we first need to remember where they started. Add a member Vector3 starting_position to PlayerController, and save transform.position in this variable in the Start method. Now this is where our CollideWithVertical method comes in useful: Override this method in PlayerController. The other collider that is passed to this method has a gameObject attribute, which tells us which other game object we are colliding with. Now we can use the tag that we just set for the water hitbox to determine if what the player hit was water or not using the CompareTag method. If the object we collide with has the tag “water” we reset transform.position to starting_position. When you play the game now, you should reset back to the start when you hit the water. We can make more water pits, or other deadly areas (like spikes) by copying the game object and moving it to the other places that should kill the player, but it would also be interesting to have moving enemies.
Enemies
We will now add a simple, Goomba-like enemy that just moves back and forth between two walls. In your level, create a little pit between two “walls” and place a new sprite (perhaps using the UISprite again) there, similar to this (it will be helpful to put this close to the start, so you can observe it quickly when you play the game):
Next, create a script EnemyController, which is derived from PhysicsObject, and attach it to the Enemy. Don’t forget that every PhysicsObject needs a Collider (use a BoxCollider2D) and a Rigidbody2D (set “Body Type” to “Kinematic”). To make our enemy move, we only need to set desiredx to some value (e.g. 3) in the Start method. Of course, now it will move towards the first wall and then get stuck there. However, remember that the Movement method calls the virtual method CollideWithHorizontal when the object hit something in x-direction. We can just override this method, and - when we hit something horizontally - set desiredx = -desiredx. With this, the enemy should move back and forth between the two walls. At this point, we can set the tag of the enemy game object to “water” and the player will reset to their starting position when they hit the enemy (from above).
Play around a bit with this new enemy, and you may notice some problems. First, because we only handled vertical collisions for the water, the player also only dies if they jump on the enemy from above, but not if they walk into it from the side (it’s actually pretty easy to get stuck this way). Also, if the player doesn’t move, and the enemy runs into them, nothing happens, because we only handle the case in which the player jumps into the enemy. Think about how you would handle all of these cases, and implement these fixes.
Putting it all together
At this point, we have the ability to draw levels, place enemies and water pits, and then move around the level. Now create a slightly larger level, and put some object as the goal. To handle a “win condition”, use the same logic as we used for detecting collisions with water and enemies, using a different tag. For now, it will suffice if the game prints a message to the debug log. Below you can also find some art assets if you want to make your game look nicer, or for use in your project.
Some Art Assets
- Unity Standard Assets (terrain textures, water, vehicles, a 2D character, code samples, etc. You probably want this for you project)
- 2D platform assets (character, blocks, enemies, coins, etc.)
- Another pack of 2D platform assets
- Roads (Free package with some restrictions; should work well for a racing game)
- Fantasy props (walls, benches, etc.)
- Medieval town exterior (buildings, well, buckets, etc.)
- Animated 3D Skeleton
Further Information
You can find a completed version of this tutorial, with some extra features, on github.
If you want to know more about tilemaps, watch this excellent tutorial, or read this article.
Some Frequent Pitfalls
-
Don’t forget to save your scripts before playing the game
-
If you make any changes to game objects in the scene in the inspector while the game is running, these changes will be discarded when you stop the game.
-
Unity using floating point numbers for positions, rotations, scale. You have to append an f to numeric literals, or your code will not compile (e.g. you have to write
0.1finstead of just0.1) -
Make your members public so you can edit them in the inspector. For development this can be useful even for values you do not want to change from the scene view, because the inspector updates live while you play the game.
-
If you can’t see any sprite, make sure it’s z-coordinate is 0, or it may end up behind the camera.
-
If the tiles in a tile map are too big or too small make sure that the value of “pixels per unit” is correct. Each tile in a tile map is (by default) 1 by 1 units, and “pixels per unit” tells Unity how to scale down the tiles.